As with most construction or DIY projects, certain precautions and procedures need to be assessed and implemented to ensure a successful result. Levelling is a process that involves determining the height of one level in relation to another. Without the proper knowledge or equipment, some errors may occur and result in inaccurate measurements, increasing the risk of user error and project cost.
Here are the most common levelling mistakes that both beginners and even professional surveyors make and how they can be avoided...
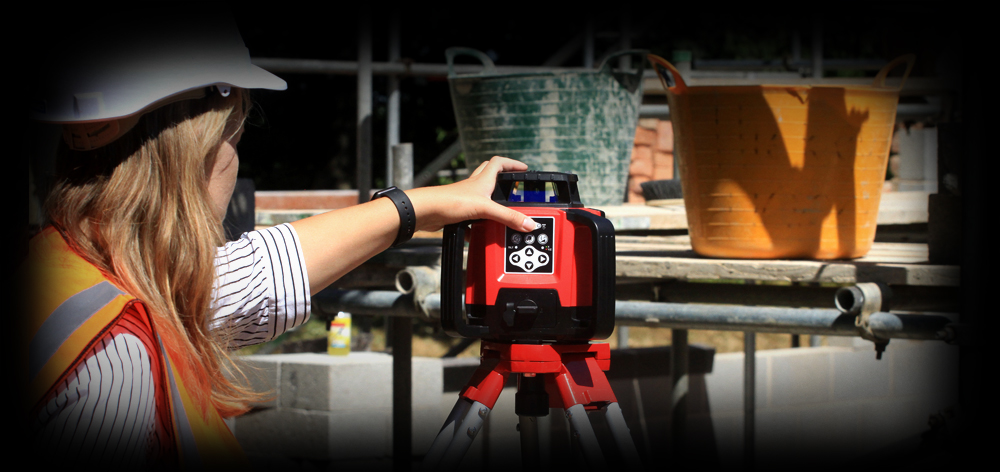
1. The Level is set-up incorrectly
In some cases, lack of knowledge or care means that an instrument won’t be set-up correctly. If one is rushing on a job, or has not been taught the appropriate techniques, the instrument will not perform to the best of its ability and will deliver unreliable results. This can be costly for any project, both with time and money, as more often than not, if measurements are wrong, the process will have to be repeated. It is always worth taking your time or checking with an expert for correct methods.
Ways to eliminate incorrect set-ups include:
- Setting up the supporting Tripod correctly is crucial in providing the platform & foundation for the instrument that will sit on top of the Tripod head.
- Whilst the Tripod legs are together, loosen the leg clips/screws to allow the Tripod legs to raise & lower, raise the Tripod to approximately chin height, then place one Tripod leg in the ground holding the other two legs, one in each hand.
- Open these two legs ensuring that they are equally spaced apart from each other and that the Tripod head is as flat as you can get it, push each of the Tripod feet into the ground, thus creating a sturdy and stable support system.
- Once the Tripod legs have been pushed into the ground, adjust the head to make a flat surface for the Level to rest on. By unclipping or unscrewing each leg and adjusting them, you can further level the tripod head more accurately.
- Ensure that your Level has a current calibration certificate from a reputable service house with manufacturer approved testing equipment.
- Quick test of your Optical Level. Should you wish to check that the instrument is calibrated & within the manufactures tolerances you can perform a quick and simple check called a Two Peg Test.
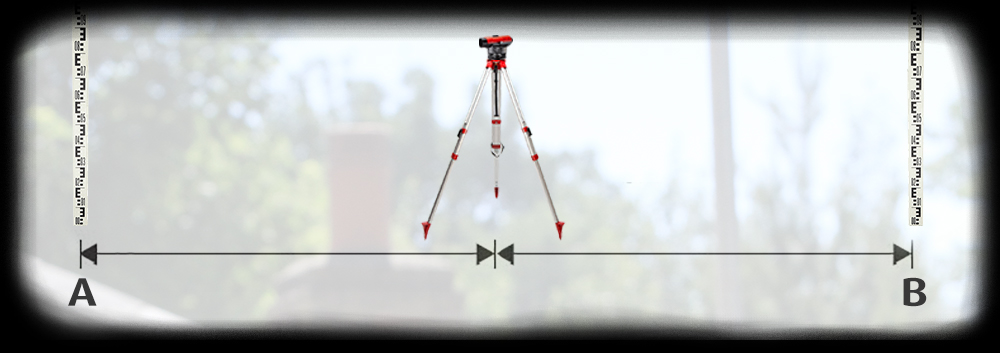
Two Peg Test
- Mark on the ground two points A & B at a distance of approximately 50 metres apart.
- Set the Level half way between the two points and carefully level it.
- Place a Staff at position A & take a Staff reading using the level.
- Now place the Staff at position B, turn the level 180 degrees and take a second Staff reading at position B.
- Take both Staff readings & deduct the smallest reading from the largest reading, note the difference between these two readings.
- Move the Level approximately three metres behind point A and read the Staff from both A and B.
The difference between the first noted reading and the second noted reading should be the same or be within the instrument's tolerance. If this is not the case, then the instrument should be sent for calibration. (Or adjusted using the tool in the box and then this process repeated.)
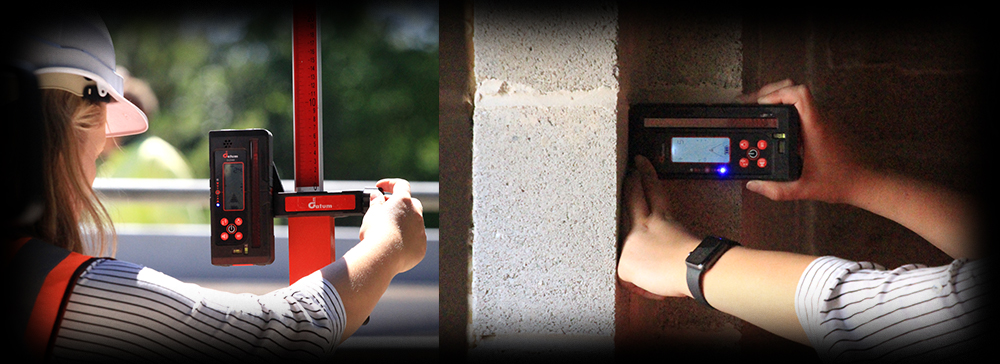
Having your level calibrated and serviced regularly will ensure that your results are accurate. To test an Optical Level, check that the circular bubble is within the centre of the circle at all times, properly focus the eye-piece and ensure that the cross hairs are as dark and as crisp as you can make them.
With a Laser Level, auto-level the instrument, then use the level's detector to note where the detector and the laser beam meet and rotate the instrument on the tripod by 180 degrees. Use the detector again to check that the first and second detector positions coincide.
2. The staff isn’t held vertically or it is misread
When levelling, a staff must always be held vertically in order to ensure the most accurate results. Levelling staffs are also prone to damage, so care must be taken so they’re in the best possible condition, they are straight and the markings are clean and complete for taking accurate readings. Not only should time be taken when reading the staff to avoid a misreading, surveyors should also follow these simple steps:
• Attach a Circular Bubble to the rear or side of the Staff, thus enabling the user constantly monitor that the Staff is vertical.
• Stand behind holding both hands down the sides of the Staff, tucking your elbows into your sides to give further stability and stand completely upright.
• For more accurate readings, you can record the lowest Staff reading by rocking the Staff back and forth.

3. The environment isn’t taken into account
Temperature, terrain and other atmospheric conditions. When preparing to level, these environmental factors need to be considered. They can throw off your readings and once again leave a user with inaccurate measurements. It is important to inspect the work site and take the necessary precautions to avoid these factors affecting your end results.
These include:
• The sun. When there is bright sunlight where you’re levelling, it can become incredibly difficult to take a precise reading. If you can shield the work area, perhaps with a surveyor's umbrella, it may be possible to continue without difficulty. When using laser levels for interior projects in very light conditions it is recommended that contractors invest in a Green Beam Laser – these Green Beam Lasers are 400% more visible to the human eye, as they are better able to recognise colours within the green spectrum.
• The temperature. In extreme heat conditions, an aluminium Staff may expand, and conversely, in extreme cold, freezing conditions, a metal staff may reduce in size - giving the user false readings in both scenarios. A Staff made of Invar will assist the user in these extreme cases, as the material is an alloy of Iron and Nickel with a negligible coefficient of expansion and contraction.
• The wind. A strong wind may disturb your instrument and the verticality of the Staff. In these conditions, it is imperative that the Level, Staff & Tripod be consistently tested and aligned. However, owing to the loss of time on a project, it is advised that the work is delayed until it passes.
If you feel prepared to take on your next levelling project, check out our comprehensive levelling range here. For accessories that help ensure you receive the most accurate results possible, click here.